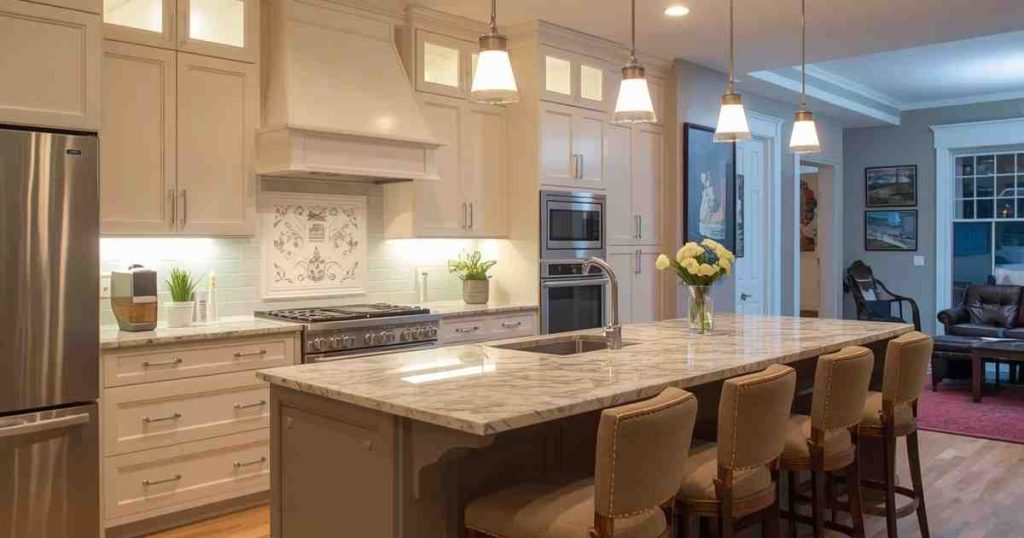
How To Plan Kitchen Lighting: A Step-By-Step Guide For Homeowners
Planning lights for your kitchen might seem tricky, especially if you’re just starting out. You want it to look nice and work well, but where do you begin? Many people feel a little lost with all the options.
This guide, How to Plan Kitchen Lighting: A Step-by-Step Guide for Homeowners, breaks it all down into simple steps.
We’ll help you create a kitchen that’s bright, inviting, and perfectly lit for everything you do. Let’s get started on making your kitchen shine.
Key Takeaways
- You will learn about the different types of kitchen lights and their jobs.
- Discover how to layer lighting for a functional and beautiful space.
- Understand how to pick the right brightness and color for your kitchen lights.
- Get tips on placing lights to avoid shadows and glare.
- Learn how to choose fixtures that match your kitchen’s style.
- See how to plan for energy efficiency in your kitchen lighting choices.
![How To Plan Kitchen Lighting A Step By Step Guide For Homeowners[1]](https://kitchentoolslab.com/wp-content/uploads/2026/05/How_To_Plan_Kitchen_Lighting__A_Step-By-Step_Guide_For_Homeowners1.jpg)
Understanding Kitchen Lighting Layers
Good kitchen lighting isn’t just one light overhead. It’s about using different kinds of lights together to make your kitchen useful and pretty. Think of it like painting a picture; you use light and shadow to create depth.
We need lights for seeing tasks, lights for making the room feel nice, and lights to highlight cool features. This layered approach means your kitchen works well for cooking, eating, and just hanging out.
Task Lighting: Seeing What You’re Doing
Task lighting is super important in a kitchen. It’s the light that helps you chop veggies, read recipes, or measure ingredients without straining your eyes. You want this light to be bright and focused right where you need it.
Without good task lighting, you might find yourself working in shadows, which can be frustrating and even a little unsafe.
Common places for task lighting are under your upper cabinets. This shines light directly onto your countertops, which are the main work areas in your kitchen. You might also want lights over your sink, your stove, or a kitchen island.
These spots are where most of the action happens. Good task lighting makes these activities easier and more enjoyable.
When choosing task lights, think about the bulb’s brightness, often measured in lumens. More lumens mean more light. Also, consider the beam angle; a narrower beam focuses light more intensely on a specific spot.
For areas like under cabinets, long, slim LED strips are a popular and effective choice. They provide a continuous wash of light without dark spots.
What is Lumens?
Lumens are a way to measure how much light a bulb gives off. The more lumens, the brighter the light. For task lighting, you generally want a higher lumen count, maybe 700-1000 lumens per fixture, depending on the area it needs to cover.
This ensures you have plenty of light to see clearly.
What is Beam Angle?
The beam angle tells you how wide the light spreads from the bulb. A narrow beam angle (like 25-30 degrees) creates a focused spotlight, great for highlighting a specific task area.
A wider beam angle (like 90-120 degrees) spreads light over a larger area, which can be good for general lighting but less so for intense tasks.
Ambient Lighting: Setting the Mood
Ambient lighting is the main light in your kitchen. It’s the general light that makes the room feel bright and welcoming. This is the light you turn on when you first walk in.
It should be comfortable and even, without being too harsh. Ambient lighting helps you see around the room and makes the space feel larger.
For ambient lighting, ceiling lights are common. These can be recessed lights (like spotlights built into the ceiling), a central pendant light, or a flush-mount fixture. The goal is to spread light evenly throughout the kitchen.
You want to avoid dark corners. The brightness should be enough to comfortably move around without needing to squint.
Dimmers are a great addition to ambient lighting. They let you change the brightness depending on the time of day or what you’re doing.
You might want it brighter during the day for cooking and a bit dimmer in the evening for a more relaxed feel.
This flexibility makes your kitchen lighting more versatile.
What are Recessed Lights?
Recessed lights, also called can lights or downlights, are lights installed into a hollow space in the ceiling.
They sit flush with the ceiling surface, giving a clean, modern look. They are excellent for providing general ambient light because you can place them strategically to cover the entire room evenly.
They don’t take up any visual space, which is great for kitchens where you might want to focus on other design elements.
What is a Pendant Light?
A pendant light hangs from the ceiling on a cord, chain, or rod. They are often used as a decorative element and can provide both ambient and task lighting.
A single large pendant over a sink or dining area can be a focal point, while a series of smaller pendants can light up a kitchen island.
They come in countless styles, from industrial to elegant, allowing them to complement various kitchen decors.
Accent Lighting: Highlighting Features
Accent lighting is used to draw attention to specific parts of your kitchen. Think of it like putting a spotlight on artwork or a beautiful architectural feature. This type of lighting adds depth and personality to your space.
It makes your kitchen more interesting and visually appealing.
Examples of accent lighting include lights inside glass-front cabinets to show off dishes, or small spotlights directed at a backsplash or a decorative shelf.
You can also use strip lights along the toe kick of your cabinets for a subtle glow. This adds a touch of elegance and makes the cabinets appear to float.
Accent lighting is less about function and more about design. It helps create different moods and can make your kitchen feel more luxurious. It’s the finishing touch that makes your kitchen stand out.
Even a few well-placed accent lights can make a big difference in how your kitchen looks and feels.
What is Toe Kick Lighting?
Toe kick lighting refers to small lights installed in the recessed area at the bottom of your kitchen cabinets, called the toe kick.
This subtle lighting creates a soft, indirect glow that can make your cabinets appear to hover above the floor. It adds a modern and sophisticated touch to the kitchen, and it can also help to illuminate the floor space near the cabinets, making it safer to navigate in low light.
What is a Backsplash?
The backsplash is the material that covers the wall between your kitchen countertop and the upper cabinets. It serves a practical purpose by protecting the wall from splashes and stains from cooking and washing.
However, backsplashes are also a major design element in a kitchen, and accent lighting can be used to highlight their texture, color, or pattern.
This can include small spotlights directed at the backsplash or integrated lighting within the upper cabinets that illuminates it.
Choosing the Right Color and Brightness
The color and brightness of your kitchen lights are just as important as where you put them. They affect how your food looks, how you feel in the room, and how well you can see. Picking the right settings ensures your kitchen is a pleasant and functional place to be.
Color Temperature: Warm vs. Cool Light
Light bulbs come in different color temperatures, measured in Kelvin (K). This tells you whether the light looks warm (like a candle) or cool (like daylight). For kitchens, a balance is often best.
Warm white light (around 2700K-3000K) has a yellowish glow. It makes spaces feel cozy and inviting, which is great for dining areas within the kitchen or general ambiance. It’s similar to the light from incandescent bulbs and can make colors appear richer.
Cool white or daylight light (around 4000K-6500K) has a bluer tone. This is excellent for task lighting because it mimics natural daylight, making it easier to see details clearly. It can help reduce eye strain while you’re working.
Many homeowners choose a warm white for ambient lighting to create a welcoming atmosphere and a cooler white for task lighting where bright, clear light is needed.
Some modern LED bulbs offer adjustable color temperatures, allowing you to change the mood of your kitchen throughout the day.
Understanding Kelvin (K)
Kelvin is a unit of measurement for color temperature. Lower Kelvin numbers (like 2700K) indicate warmer, more yellow light, while higher Kelvin numbers (like 6500K) indicate cooler, more blue light.
For kitchens, a common approach is to use warm white (2700K-3000K) for ambient lighting to create a cozy feel, and neutral or cool white (3500K-5000K) for task lighting to ensure clarity and reduce eye strain during food preparation.
Some advanced LED systems allow you to adjust the Kelvin temperature, offering flexibility to suit different activities and times of day.
Brightness Levels: Lumens and Wattage
Brightness is measured in lumens. Wattage used to be the standard, but with LEDs, lumens are more accurate for brightness. A higher lumen count means a brighter light.
For a kitchen, you’ll want different lumen levels for different types of lighting.
General ambient lighting might need around 20-30 lumens per square foot. Task lighting, however, should be much brighter, perhaps 70-80 lumens per square foot, directed specifically at your work surfaces. Accent lighting can be much dimmer, just enough to highlight a feature without being overpowering.
It’s also helpful to think about dimmability. Most kitchen lights, especially ambient and task lights, should be dimmable. This allows you to adjust the brightness for different activities and times of the day.
A dimmable kitchen can go from a bright workspace to a softly lit dining spot.
Dimmability: Controlling Light Intensity
Dimmability allows you to control the brightness of your lights, which is incredibly useful in a kitchen. You can dim the lights for a relaxed dinner or brighten them up for intense food prep. Not all LED bulbs and fixtures are dimmable, so it’s important to check the product specifications.
You also need a compatible dimmer switch. Using non-dimmable bulbs with a dimmer switch can cause flickering or damage the bulbs.
Example Brightness Calculations
Let’s say you have a kitchen that is 10 feet by 15 feet, so it’s 150 square feet. For general ambient lighting, you’d want about 20 lumens per square foot. That means 150 sq ft 20 lumens/sq ft = 3000 lumens total for ambient light.
For task lighting over your counters, you might want 70 lumens per square foot in that specific area. If your counter space is 30 square feet, that’s 30 sq ft 70 lumens/sq ft = 2100 lumens just for task lighting.
Choosing LED Lights
LED (Light Emitting Diode) lights are the best choice for modern kitchens. They use much less energy than older types of bulbs, so they save you money on your electricity bill. LEDs also last a very long time, meaning you won’t have to change bulbs very often.
LEDs come in all sorts of styles, colors, and brightness levels. You can find LED bulbs that fit into your existing fixtures. They are also good for the environment because they don’t contain mercury and use less power.
This makes them a smart and responsible choice for your kitchen lighting.
Benefits of LED Lighting
LEDs are popular for many good reasons. They are very energy-efficient, using up to 80% less energy than traditional incandescent bulbs. This means lower electricity bills for you.
They also last much longer, often 25,000 to 50,000 hours, compared to incandescent bulbs that might last only 1,000 to 2,000 hours.
This means fewer bulb changes and less hassle. LEDs also produce very little heat, which can help keep your kitchen cooler, especially in the summer.
They are also more durable and resistant to breakage than glass bulbs.
Consider this statistic: The average household can save $75 or more per year on energy bills by switching to LED lighting. (Source: ENERGY STAR). With rising energy costs, this saving becomes even more significant over the lifespan of the LEDs.
Planning the Layout and Fixture Placement
Once you know what types of lights you need and their characteristics, the next step is figuring out where to put them.
The placement of your lights can make a big difference in how well your kitchen works and how it looks. Good planning prevents shadows and makes your kitchen feel open and inviting.
Layout for Task Lighting
Task lighting needs to be placed directly above or in front of your work areas. For under-cabinet lighting, the fixtures should be mounted as close to the front edge of the cabinet as possible, but still hidden from direct view when standing. This directs light down onto the countertop and prevents shadows cast by your body.
If you have a kitchen island, pendant lights hung over the island are popular. They provide direct light for working on the island and also add a decorative touch.
The height of these pendants is important; they should be low enough to be effective but not so low that they get in the way or create glare when you look up.
For stovetops, consider range hood lights. Many range hoods have built-in lights that illuminate the cooking surface.
If yours doesn’t, or if you want better lighting, you might need to add dedicated task lights near the stove.
Sample Scenario: Island Lighting
Imagine a kitchen island that is 3 feet wide and 8 feet long. You decide to hang three pendant lights over it.
To ensure good coverage and avoid glare, you might space them about 2 feet apart from each other and 18-24 inches from the edge of the island.
This creates a balanced look and provides light for chopping, preparing food, or eating at the island.
Layout for Ambient Lighting
Ambient lights, like recessed lights, should be spaced evenly across the ceiling to provide uniform light. A common rule of thumb is to space them about 3-4 feet apart.
You also need to consider the distance from the walls; placing them about 2-3 feet away from the walls can help bounce light off them, making the room feel brighter and larger.
If you’re using a central ceiling fixture, make sure it’s sized appropriately for your kitchen. A fixture that is too small will not provide enough light, while one that is too large can overwhelm the space. The goal is to create a comfortable, even glow throughout the room.
Consider the height of your ceilings when placing ambient lights. For higher ceilings, you might need brighter bulbs or fixtures that spread light further. For lower ceilings, flush-mount or semi-flush mount fixtures are often better than those that hang down too far.
Spacing Recessed Lights
A good way to figure out how to space recessed lights is to use a simple formula. Divide the ceiling height by two to get the ideal spacing distance.
For example, in a kitchen with 8-foot ceilings, spacing the lights about 4 feet apart would give you even coverage.
You also want to place them about halfway between the center of the room and the walls. This helps prevent harsh shadows at the edges of the room and makes the light feel more distributed.
Layout for Accent Lighting
Accent lights are placed strategically to shine on specific features. For lights inside glass cabinets, small LED puck lights or strip lights can be installed along the top or sides of the cabinet interior. Aim them so they illuminate the items inside without creating glare on the glass.
If you’re highlighting a backsplash, small, adjustable spotlights mounted under the upper cabinets can be angled precisely.
For toe kick lighting, small, low-profile LED strips or pucks are usually installed along the front edge of the cabinet base, tucked away so they are not visible.
The key to accent lighting is to not overdo it. A few well-chosen accent lights can make a big impact. Too many can make the kitchen feel cluttered and distracting.
Case Study: Modernizing a Small Kitchen
A homeowner with a small, older kitchen struggled with dim lighting and limited counter space. They decided to update their lighting by installing dimmable LED recessed lights for ambient light, spaced evenly for good coverage.
Underneath their upper cabinets, they added slim LED strips for task lighting, which completely lit up their countertops.
Finally, they installed subtle LED strip lights along the toe kicks of their base cabinets, creating a soft, floating effect.
The result was a kitchen that felt much larger, brighter, and more functional, with clear light for cooking and a pleasant glow for relaxing.
The cost for fixtures and professional installation was around $1,500, and they noticed an immediate improvement in their ability to work in the kitchen.
Selecting Kitchen Fixtures and Styles
The actual light fixtures you choose are crucial. They not only provide the light but also contribute significantly to your kitchen’s overall look and feel. Think about how the fixtures will blend with your existing decor or the style you’re aiming for.
Matching Fixtures to Your Kitchen Style
Your kitchen’s style—whether it’s modern, farmhouse, traditional, or eclectic—should guide your fixture choices.
For a modern kitchen, sleek lines and metallic finishes are common. Think minimalist pendant lights or simple, integrated LED ceiling lights.
Farmhouse kitchens often feature fixtures with rustic elements, like barn-style pendants or lights with wood accents.
Traditional kitchens might lean towards more ornate designs, perhaps with glass shades or decorative metalwork.
Always consider the materials and finishes—chrome, brushed nickel, matte black, brass, or wood tones can all create different effects.
It’s also important that the fixtures are practical for a kitchen environment. They should be easy to clean, as kitchen grease and steam can build up over time. Materials like glass, metal, and durable plastics are generally good choices.
Fixture Materials and Finishes
The materials and finishes of your light fixtures play a big role in your kitchen’s aesthetic. Metals like brushed nickel and chrome offer a clean, modern look that’s also easy to maintain. Matte black fixtures can add a sophisticated, contemporary edge.
Warm metals like brass or copper can bring a touch of elegance and warmth, fitting well in both modern and traditional designs.
Natural materials like wood or ceramic can add texture and a unique feel, especially in farmhouse or bohemian-style kitchens.
When choosing, consider how the finish will complement your cabinet hardware, faucets, and other metallic accents in the room.
Types of Kitchen Light Fixtures
There are many types of fixtures to consider:
- Recessed Lights: These are built into the ceiling and provide a clean look. They are excellent for general ambient light.
- Pendant Lights: Hanging lights that are great for islands, sinks, or dining areas. They add style and focused light.
- Track Lighting: A system of lights on a track that can be moved and angled. Good for flexible lighting needs.
- Flush Mount & Semi-Flush Mount Lights: These sit close to the ceiling and are good for lower ceilings or as a main ambient light source.
- Under-Cabinet Lights: Slim fixtures installed under upper cabinets to light up countertops. They are essential for task lighting.
- Chandeliers: For larger kitchens or kitchens with dining areas, a chandelier can be a statement piece.
- Sconces: Wall-mounted lights that can add accent or ambient light, often used in dining nooks or to flank windows.
When selecting fixtures, think about how they will work together. You don’t want too many competing styles. A consistent theme throughout your kitchen lighting will create a more cohesive and pleasing design.
Example Fixture Comparison
Here’s a look at how different fixtures can serve different purposes:
| Fixture Type | Primary Use | Style Contribution | Considerations |
|---|---|---|---|
| Recessed Lights | Ambient Lighting | Clean, modern, unobtrusive | Need proper spacing, can cast shadows if not placed well |
| Pendant Lights | Task & Accent Lighting | Decorative focal point, adds personality | Height and spacing are crucial, can be too low if not careful |
| Under-Cabinet Lights | Task Lighting | Functional, highlights countertops and backsplash | Need to be hidden from direct view to avoid glare |
| Flush Mount Lights | Ambient Lighting | Simple, functional, good for low ceilings | May offer less directed light than recessed |
Energy Efficiency and Smart Lighting
In today’s world, energy efficiency is key. As mentioned, LEDs are a great starting point. Look for ENERGY STAR certified fixtures and bulbs, which meet strict energy efficiency guidelines.
This means they use less electricity and save you money.
Smart lighting systems offer even more control and efficiency. You can use your smartphone or voice commands to turn lights on and off, adjust brightness, and even change color. Some smart systems can learn your habits and adjust lighting automatically to save energy.
This technology can add convenience and help reduce your energy consumption significantly.
What is ENERGY STAR?
ENERGY STAR is a program run by the U.S. Environmental Protection Agency and the U.S. Department of Energy.
It helps consumers and businesses save money and protect the environment through energy-efficient products and practices.
Products that earn the ENERGY STAR label meet strict energy efficiency standards set by the EPA. For lighting, this means LED bulbs and fixtures that use less electricity to produce the same amount of light as less efficient models.
Choosing ENERGY STAR certified lighting is a reliable way to ensure you are getting an energy-efficient and high-quality product.
Smart Lighting Features
Smart lighting systems offer a range of advanced features. You can control your lights remotely using a smartphone app, which is handy if you forget to turn lights off or want to turn them on before you arrive home.
Many systems allow you to set schedules, so lights turn on and off automatically at certain times, enhancing security and convenience.
Voice control, through smart assistants like Amazon Alexa or Google Assistant, lets you manage your lights hands-free.
Some smart bulbs can even change color, offering options for mood lighting. These features contribute to both convenience and energy savings by allowing for precise control over when and how brightly your lights are used.
Putting It All Together: A Step-by-Step Plan
Now that we’ve covered the different aspects of kitchen lighting, let’s create a simple, step-by-step plan to help you implement it. This guide will help you organize your thoughts and make the best choices for your kitchen.
Step 1: Assess Your Kitchen and Needs
Before you buy anything, take a good look at your kitchen. What activities happen there? Is it mainly for cooking, or do you also eat, work, or entertain in it?
Note the size of the room, the ceiling height, and the locations of your main work areas (stove, sink, counters, island). Think about the existing natural light you have.
Make a list of what you want your lighting to do:
- Brighten work surfaces for cooking.
- Create a warm and inviting atmosphere for dining.
- Highlight decorative features like a backsplash.
- Ensure safety when moving around.
Consider your budget and the style you want to achieve. This initial assessment is the foundation for all your lighting decisions.
Step 2: Decide on Lighting Layers
Based on your assessment, determine which layers of lighting you need. Most kitchens benefit from all three: ambient, task, and accent. Think about how much emphasis you want to place on each.
For example, if you love to cook complex meals, you’ll need excellent task lighting. If your kitchen is also a gathering spot, invest more in ambient lighting that creates a welcoming mood. You might decide on:
- Ambient: Even light throughout the room.
- Task: Bright light directly on countertops, stove, and sink.
- Accent: Subtle light for cabinets, shelves, or decorative elements.
Sketching a simple floor plan can help you visualize where each layer will be most effective.
Step 3: Choose Fixture Types and Styles
Now, select the types of fixtures that will provide each layer of light and match your kitchen’s style. For ambient light, consider recessed lights or a stylish flush mount. For task lighting, think about under-cabinet LEDs or pendants over an island.
For accent lighting, look at small puck lights or strip LEDs.
Shop around to find fixtures that fit your aesthetic. Make sure they are the right size for your space. For instance, a very large island might need multiple pendant lights, while a smaller one could work with a single statement fixture.
Step 4: Determine Color Temperature and Brightness
Decide on the color temperature (warm or cool) for each type of light. Generally, warm white (2700K-3000K) is good for ambient and accent lighting to create a cozy feel. Neutral to cool white (3500K-5000K) is best for task lighting to ensure clarity.
Consider the brightness (lumens) needed for each area. Ensure your chosen fixtures provide sufficient lumens per square foot for both general illumination and focused tasks. Plan for dimmers on most of your lights to allow for flexibility.
Step 5: Plan the Layout and Placement
This is where you map out exactly where each fixture will go. Use your floor plan to mark the positions of recessed lights, pendants, and under-cabinet fixtures. Remember to consider spacing rules to avoid dark spots or glare.
For task lighting, ensure it directly illuminates your work surfaces without casting shadows.
If you’re hiring an electrician, this detailed plan will be invaluable. It helps ensure the final installation meets your needs and looks great.
Step 6: Consider Energy Efficiency and Smart Features
Finally, prioritize energy-efficient options like LED bulbs and fixtures. Look for the ENERGY STAR label. If your budget allows, explore smart lighting options for added convenience and control.
This step ensures your kitchen lighting is not only beautiful and functional but also cost-effective and environmentally friendly.
Example Scenario: Planning a Small Kitchen
Let’s plan lighting for a small kitchen, about 8 feet by 10 feet. For best results, choose fixtures that are LED and ENERGY STAR certified.
- Assess: This kitchen is used for cooking and casual meals. It has a small sink, a stove, and limited counter space. The ceiling is 8 feet high. The goal is to make it feel brighter and more functional.
- Layers: We need ambient light for general illumination, strong task lighting over the counters and stove, and maybe some accent lighting inside a small glass-front cabinet.
- Fixtures: For ambient light, two semi-flush mount fixtures on the ceiling. For task lighting, LED strips under the upper cabinets and a light over the stove. For accent, a small puck light inside the glass cabinet.
- Color/Brightness: Semi-flush mounts will be warm white (3000K). Under-cabinet LEDs will be neutral white (4000K) for clarity. The puck light can be warm white. All lights will be dimmable.
- Layout: The two semi-flush lights will be spaced evenly in the room. The under-cabinet lights will run the length of the counter. The puck light goes inside the cabinet.
- Efficiency: All chosen fixtures will be LED and ENERGY STAR certified.
This plan creates a bright, well-lit kitchen that feels more spacious and is a pleasure to cook in.
Frequently Asked Questions Of How To Plan Kitchen Lighting: A Step-By-Step Guide For Homeowners
What is the best type of light for kitchen counters?
The best type of light for kitchen counters is task lighting, usually in the form of LED strips or puck lights installed under your upper cabinets. These provide bright, focused light directly on your work surfaces, preventing shadows and making it easier to chop, prepare food, and clean.
How many lights do I need for my kitchen ceiling?
For ambient lighting using recessed lights in an 8-foot ceiling kitchen, a common rule is to place them about 4 feet apart. For a 10×10 foot kitchen, you might need around 4-6 recessed lights. If you are using a central fixture like a flush mount, one or two might be enough, depending on their size and brightness.
Should my kitchen lights be warm or cool?
It’s best to use a mix. Warm white light (around 2700K-3000K) is great for ambient and accent lighting to create a cozy feel. Cool or neutral white light (around 3500K-5000K) is better for task lighting, as it provides clearer visibility for food preparation and other activities.
Can I mix different styles of light fixtures in my kitchen?
Yes, you can mix styles, but it’s best to keep a consistent theme. For example, if you have modern cabinets, choose modern-style fixtures. You can mix types of lights (like pendants and recessed lights) as long as they share a similar finish or design feel to create a cohesive look.
Is it okay to have lights that are too bright in the kitchen?
While brightness is important for task lighting, having lights that are too bright for ambient lighting can make a kitchen feel harsh or sterile. Using dimmers on your ambient and accent lights is a great way to control the mood and brightness, allowing you to adjust it as needed.
Conclusion
Planning your kitchen lighting doesn’t have to be complicated. By layering lights for different purposes, choosing the right color and brightness, and carefully placing your fixtures, you can create a kitchen that is both beautiful and highly functional. Following these steps will help you achieve a well-lit space that perfectly suits your home and lifestyle. Look for the ENERGY STAR label to ensure fixtures meet strict efficiency standards.

![Recessed Vs Surface Mounted Kitchen Lighting Which One Should You Choose[1]](https://kitchentoolslab.com/wp-content/uploads/2026/05/Recessed_Vs_Surface-Mounted_Kitchen_Lighting__Which_One_Should_You_Choose1-768x403.jpg)
![Pendant Lights Over Kitchen Island How Many, What Size, And How High[1]](https://kitchentoolslab.com/wp-content/uploads/2026/05/Pendant_Lights_Over_Kitchen_Island__How_Many_What_Size_And_How_High1-768x403.jpg)
![How To Retrofit Led Lighting In An Old Kitchen Without Full Rewiring[1]](https://kitchentoolslab.com/wp-content/uploads/2026/05/How_To_Retrofit_Led_Lighting_In_An_Old_Kitchen_Without_Full_Rewiring1-768x403.jpg)
![Statement Pendant Lights For Kitchens Trends In Brass, Black, And Mixed Metals[1]](https://kitchentoolslab.com/wp-content/uploads/2026/05/Statement_Pendant_Lights_For_Kitchens__Trends_In_Brass_Black_And_Mixed_Metals1-768x403.jpg)
![Smart Kitchen Lighting Dimmer Switches, Motion Sensors, And App Controlled Systems[1]](https://kitchentoolslab.com/wp-content/uploads/2026/05/Smart_Kitchen_Lighting__Dimmer_Switches_Motion_Sensors_And_App-Controlled_Systems1-768x403.jpg)
![How To Light A Kitchen With No Natural Light Solutions That Actually Work[1]](https://kitchentoolslab.com/wp-content/uploads/2026/05/How_To_Light_A_Kitchen_With_No_Natural_Light__Solutions_That_Actually_Work1-768x403.jpg)