How To Organize A Small Kitchen: A Room-By-Room Storage System
Have you ever opened your kitchen cabinets and felt a wave of chaos? Cans tumbling out, pots and pans clattering, and that one elusive spatula always hiding.
It’s a common struggle, especially in smaller homes. This guide will show you how to organize a small kitchen: a room-by-room storage system that will transform your cooking space from a clutter zone to a functional haven.
By the end, you’ll spend less time searching and more time enjoying your kitchen, boosting engagement and keeping readers on the page.
Key Takeaways
- Small kitchens can be highly organized with a systematic approach.
- Utilizing vertical space is key to maximizing storage in tight areas.
- Categorizing items by function and frequency of use makes retrieval easy.
- Drawer organizers and cabinet shelves create order within existing spaces.
- A dedicated system for pantry items prevents overbuying and waste.
- Regular decluttering is essential for maintaining an organized kitchen.
![How To Organize A Small Kitchen A Room By Room Storage System[1]](https://kitchentoolslab.com/wp-content/uploads/2026/05/How_To_Organize_A_Small_Kitchen__A_Room-By-Room_Storage_System1.jpg)
Transforming Your Small Kitchen Spaces
This section will guide you through creating an organized kitchen, focusing on practical, space-saving strategies.
We will explore how to make every inch count, from the smallest drawer to the largest cabinet. The goal is to create a kitchen that is not only tidy but also efficient for everyday use.
Maximizing Vertical Storage
Vertical space is your best friend in a small kitchen. Think upwards! Adding shelves, risers, and wall-mounted solutions can dramatically increase your storage capacity without taking up more floor space. This is especially useful for items you don’t use every single day.
- Cabinet Shelf Risers: These simple additions create an extra layer of shelving within your existing cabinets. This allows you to store more items at different heights, making it easier to see and access everything.
These risers are fantastic for stacking plates, bowls, or even small appliances. They prevent items from getting lost at the back of deep cabinets and allow you to double your storage in some cases. Imagine being able to store two rows of mugs instead of just one.
- Wall-Mounted Spice Racks: Free up cabinet space by mounting your spice collection on the wall. This keeps them visible and easily accessible while cooking.
A well-placed spice rack can be both functional and decorative. It transforms a blank wall into a useful storage area and allows you to quickly grab the seasoning you need without digging through a crowded cabinet. This also makes it easier to see when you’re running low on a particular spice.
- Hanging Pot Racks: If you have a lot of pots and pans, a hanging rack can be a great solution. This can be ceiling-mounted or wall-mounted, freeing up valuable cabinet and drawer space.
Pot racks are excellent for heavy or bulky items. They keep them organized and off the counters, preventing that cluttered look. Plus, having your pots and pans on display can add a rustic charm to your kitchen décor.
Smart Drawer Organization
Drawers can quickly become a jumbled mess of utensils and gadgets. Using drawer organizers can bring order and make it simple to find exactly what you need.
- Cutlery Trays: The classic solution for forks, knives, and spoons. Look for adjustable or expandable trays to fit your specific drawer size.
A good cutlery tray keeps your utensils separated and easy to grab. No more rummaging for a matching fork! Many trays have different compartments for various types of utensils, making it even more efficient.
- Utensil Dividers: For larger kitchen tools like spatulas, whisks, and ladles, dividers can keep them from all jumbling together.
These dividers allow you to create custom sections within a drawer. You can group similar items together, ensuring that your favorite spatula is always easy to find. This prevents the common problem of having to lift out a whole handful of utensils just to get to one.
- Small Bin Inserts: Use small bins or containers within drawers to group smaller items like measuring spoons, bag clips, or bottle openers.
These small bins are perfect for corralling tiny items that tend to get lost. They create little zones of organization within a larger drawer, making it much easier to keep track of your smaller kitchen accessories. This prevents them from scattering and becoming difficult to locate.
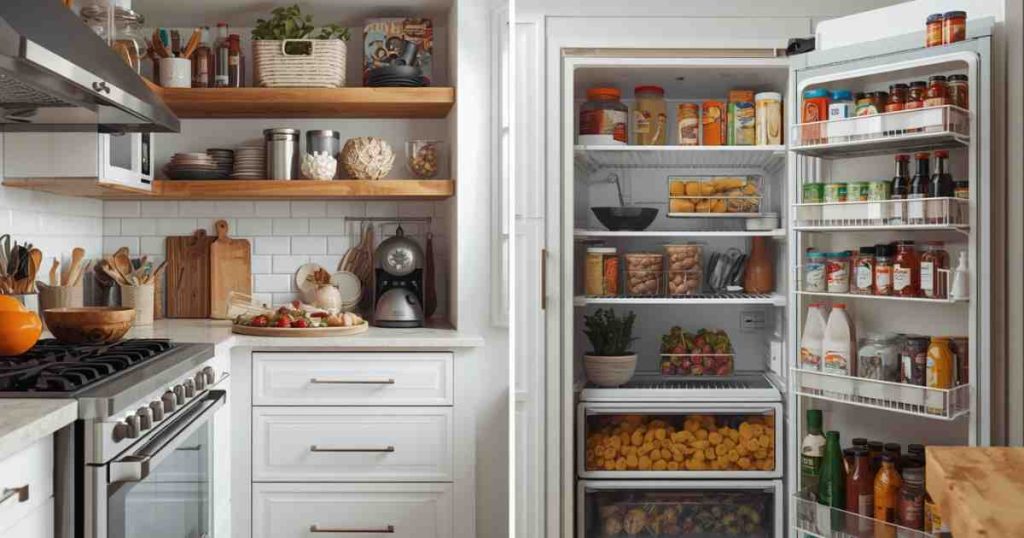
Organizing Your Kitchen Pantry
Even a small pantry or cabinet can become overwhelming. A systematic approach ensures you know what you have, can find what you need, and avoid waste.
Categorizing Food Items
The first step to an organized pantry is grouping similar items. Think about how you use your food and create logical sections.
- Baking Supplies: Flour, sugar, baking soda, chocolate chips, and spices used for baking.
Keeping all baking ingredients together makes it simple when you decide to bake cookies or a cake. You won’t have to hunt for each individual item, saving you time and frustration. This also helps you see if you’re running low on essentials before you start a recipe.
- Canned Goods: Soups, vegetables, beans, and fruits.
Cans can easily stack up and become a jumbled mess. Using can organizers or simply arranging them by type makes it much easier to find what you’re looking for. Consider placing older items in front to ensure they are used first.
- Snacks and Breakfast Items: Cereals, granola bars, crackers, and breakfast pastries.
Designate a specific area for snacks and breakfast foods. This is especially helpful if you have children who often grab their own snacks. It keeps these items contained and prevents them from spreading throughout the pantry.
- Pasta, Rice, and Grains: All your dry staple grains.
Storing these together ensures you know your options when planning meals. Decanting them into clear, airtight containers can save space and keep them fresh longer. It also makes your pantry look much neater.
Utilizing Pantry Storage Solutions
Once items are categorized, specific storage solutions can enhance order and accessibility.
- Airtight Containers: For staples like flour, sugar, pasta, and cereal.
These containers not only keep your food fresh and prevent spills but also create a uniform look in your pantry. They are often stackable, allowing you to maximize vertical space. Clear containers let you see contents at a glance, making inventory easy.
- Lazy Susans: Perfect for corners or deep shelves to easily access items like jars, oils, or spices.
A Lazy Susan rotates, bringing items from the back to the front with a simple spin. This is incredibly useful for items that tend to get lost in the depths of a pantry shelf, such as small jars or bottles.
- Clear Bins and Baskets: For grouping smaller items like seasoning packets, tea bags, or fruit cups.
Using bins helps contain loose items and keeps them from scattering. They also make it easy to pull out an entire category of items if needed. Clear bins allow you to see what’s inside without pulling them out.
Real-Life Example: The Overwhelmed Graduate Student
Sarah, a graduate student, lived in a small studio apartment with a very limited kitchen. Her pantry, a single cabinet, was a disaster. Cans were piled high, boxes of pasta were hidden, and she often found expired goods.
She decided to implement a room-by-room storage system. First, she cleared everything out. She grouped items, then used airtight containers for dry goods and clear bins for smaller packets. She also added a small shelf riser.
Within a week, she found she was buying less duplicate food because she could easily see what she had. Her cooking time also decreased because she wasn’t hunting for ingredients.
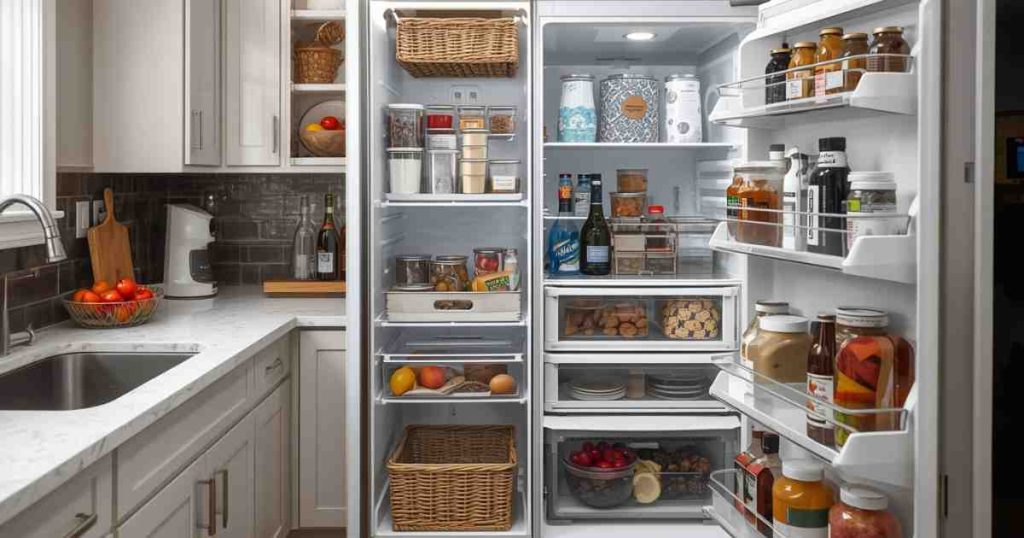
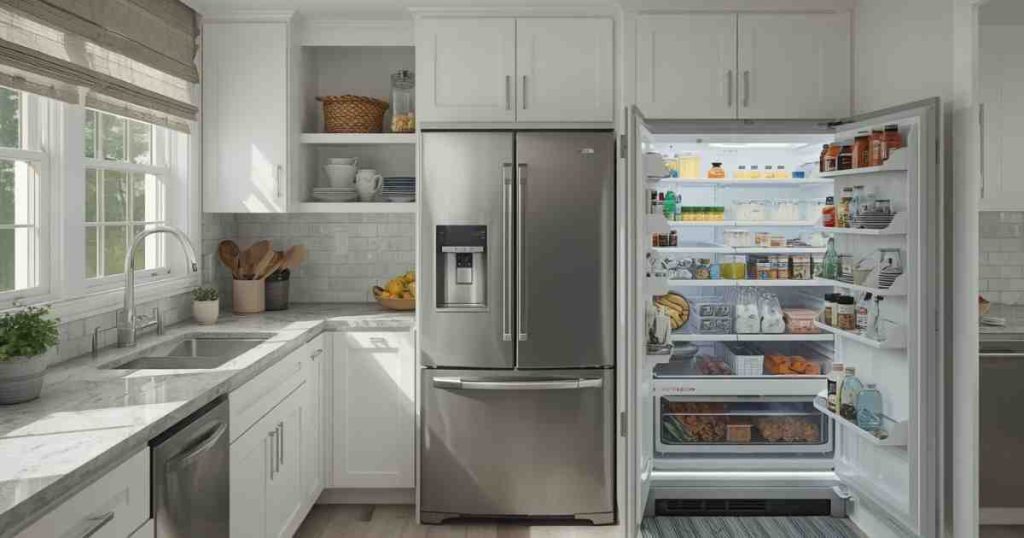
Organizing Your Refrigerator and Freezer
These crucial appliances also need a system to keep food fresh and prevent waste.
Refrigerator Organization Tips
Keeping your fridge tidy ensures food stays at its best and you use what you have.
- Designated Zones: Assign specific shelves for different food types (e.g., dairy on one shelf, leftovers on another, produce in drawers).
This strategy helps maintain consistent temperatures for different foods. For instance, dairy products often benefit from being on a middle shelf where the temperature is most stable. Produce drawers are designed to control humidity for fruits and vegetables.
- Clear Containers for Leftovers: Use clear, stackable containers so you can easily see what’s inside.
Seeing your leftovers at a glance encourages you to eat them before they spoil. Stackable containers save space and create a neat appearance, preventing that overwhelming pile of mismatched containers.
- Door Storage for Condiments: The door is ideal for items that can tolerate temperature fluctuations.
Condiments like ketchup, mustard, and salad dressings are perfect for door shelves. However, avoid storing milk or eggs here, as the temperature is less stable.
Freezer Organization Strategies
A well-organized freezer prevents freezer burn and makes meal prep easier.
- Label Everything: Always label food with the contents and date it was frozen.
Labeling is critical for identifying items and ensuring you use older food first. This prevents the dreaded “mystery item” that has been in the freezer for months. Dates help you avoid consuming food that has lost its quality due to freezer burn.
- Use Freezer-Safe Bags and Containers: These protect food from air and moisture, preventing freezer burn.
Proper packaging is essential for maintaining food quality in the freezer. Invest in good quality freezer bags or containers to keep your food tasting fresh for longer.
- Group Similar Items: Store meats together, vegetables together, etc.
Grouping similar items makes it easier to find what you need quickly. For example, if you’re looking for chicken breasts, you know exactly where to look without digging through various packages.
Organizing Your Countertops and Sink Area
Countertops are prime real estate in a small kitchen. Keeping them clear makes the space feel larger and more functional.
Clearing the Counters
The goal is to have as much clear counter space as possible for food preparation.
- Store Appliances When Not in Use: Put away toasters, blenders, and coffee makers after each use if possible.
Leaving appliances out can make a small kitchen feel cluttered and cramped. If you don’t use them daily, finding a home for them in cabinets or a pantry makes a big difference.
- Use Wall Space for Utensils: Hang frequently used cooking utensils on a wall-mounted rack.
This frees up drawer space and keeps essential tools within easy reach. It also adds a practical, decorative element to your kitchen walls.
- Consider a Magnetic Knife Strip: This mounts to the wall and keeps knives off the counter and out of drawers.
Magnetic knife strips are a space-saving and safe way to store knives. They are easily accessible and keep your knives sharper than if they were rattling around in a drawer.
Streamlining the Sink Area
The sink area is a high-traffic zone that needs to be kept organized to be functional.
- Use a Sink Caddy: This holds dish soap, sponges, and brushes, keeping them contained and tidy.
A sink caddy prevents clutter around the sink and keeps cleaning supplies organized and accessible. Look for one that allows for drainage to keep things dry and hygienic.
- Install a Dish Drying Rack that Drains Directly into the Sink: This eliminates the need for a separate drying mat on the counter.
These racks are designed to fit over or in the sink, making dish drying more efficient and keeping your countertops dry. They are often collapsible for easy storage when not in use.
- Keep Cleaning Supplies Accessible but Hidden: Store dish soap, dishwasher detergent, and cloths under the sink in a caddy or drawer.
Keeping cleaning supplies out of sight makes the sink area look much tidier. Utilizing under-sink organizers can maximize this often-wasted space.
Real-Life Example: The Busy Parent’s Countertop Rescue
Maria, a mom of two young children, found her kitchen countertops constantly covered in school papers, mail, and stray toys.
Her small kitchen felt even smaller. She decided to tackle the countertop organization specifically. She bought a wall-mounted utensil rack and hung her most-used cooking tools.
She also installed a small magnetic knife strip. For mail and papers, she designated a small basket on a nearby shelf that she emptied daily.
Her sink area got a caddy for soaps and sponges. The result was a dramatically more open and functional cooking space, allowing her to prepare meals without constantly having to clear a path.
Organizing Your Kitchen Cabinets
Cabinets often become a dumping ground for pots, pans, dishes, and small appliances. Here’s how to bring order.
Optimizing Cabinet Space
Every shelf and corner can be used more effectively with the right strategies.
- Stack Pots and Pans Neatly: Use pot lid organizers or dividers to keep lids and pans from becoming a jumbled mess.
Lids are often the culprits of cabinet chaos. A dedicated lid organizer keeps them upright and easy to access, preventing the need to dig through a stack of pans to find the right one.
- Store Dishes by Size and Type: Stack plates together, bowls together, and mugs together.
This creates neat stacks that are easy to manage and access. It also helps you see at a glance how many of each item you have.
- Use Cabinet Door Space: Mount small racks on the inside of cabinet doors for items like cutting boards or cleaning supplies.
This hidden storage is perfect for often-used but not-so-attractive items. It utilizes otherwise unused space and keeps things organized and out of sight.
Dealing with Awkward Spaces
Corner cabinets and deep shelves can be challenging.
- Corner Cabinet Solutions: Consider pull-out shelves or Lazy Susans designed for corner cabinets.
These specialized organizers make it easy to access items stored deep within corner cabinets, eliminating the “dead space” problem. They bring everything to the front with a simple pull or turn.
- Deep Shelf Dividers: Use shelf dividers to create sections on deep shelves, preventing items from falling over.
Dividers help keep items upright and organized on deep shelves. This is particularly useful for storing items like baking sheets or cutting boards.
- Under-Shelf Baskets: These slide onto existing shelves to create extra storage for smaller items like lids or dish towels.
These baskets are a simple way to add more storage without installing new shelves. They are great for utilizing the space between shelves, adding another layer of organization.
Sample Scenario: The Small Apartment Cook
Alex lives in a tiny apartment kitchen with very little cabinet space. They love to cook but struggled with organization.
They decided to implement a room-by-room system. For their pots and pans, they invested in stackable cookware and a pot lid organizer.
They used shelf risers in their main cabinet to double the storage for plates and bowls. Their seldom-used blender was stored in a box on the highest shelf.
Their countertops were cleared by using a magnetic knife strip and hanging utensils. The result was a kitchen that felt significantly larger and was much easier to cook in.
Maintaining Your Organized Kitchen
Organization isn’t a one-time event; it’s an ongoing habit.
Regular Decluttering
Schedule time to go through your kitchen and get rid of items you no longer need or use.
- Monthly Check-in: Dedicate 15-30 minutes each month to quickly scan cabinets and drawers for expired items or things you haven’t used.
A quick monthly declutter prevents clutter from building up again. It’s much easier to maintain a system than to let it get out of hand and then have to do a major overhaul.
- Seasonal Purge: Twice a year, do a more thorough declutter of appliances, gadgets, and seldom-used items.
This deeper clean allows you to reassess your needs and get rid of anything that’s no longer serving you. Consider donating items in good condition.
Daily Habits for Order
Small, consistent actions can keep your kitchen organized day-to-day. Implementing safe food storage practices from the USDA helps keep your kitchen organized and safe.
- “Clean as You Go”: Wash dishes or put them in the dishwasher immediately after using them. Wipe down counters after each meal.
This simple habit prevents a pile-up of dirty dishes and sticky counters, making your kitchen a more pleasant place to be. It also makes future clean-ups much easier.
- Put Items Back Immediately: When you finish using a utensil, pot, or ingredient, return it to its designated spot right away.
This habit prevents items from accumulating on counters or getting lost. It reinforces your organization system and keeps things tidy.
Frequently Asked Questions Of How To Organize A Small Kitchen: A Room-By-Room Storage System
How do I deal with limited drawer space?
Use drawer dividers, utensil organizers, and small bins to categorize and compartmentalize items. Maximize vertical space by stacking items neatly when possible.
What if I have a lot of small appliances?
Store seldom-used appliances in cabinets or even a nearby closet. For frequently used ones, consider wall-mounted solutions or designated “appliance zones” on your counter.
How can I make my small kitchen look bigger?
Keep countertops as clear as possible. Use light colors, good lighting, and reflective surfaces like mirrors or glossy cabinet fronts to create an illusion of space.
Is it worth buying special organizers for a small kitchen?
Yes, specialized organizers are often designed for small spaces and can significantly improve efficiency. They help you maximize every inch of storage.
How often should I declutter my kitchen?
Aim for a quick monthly check-in to remove expired items and a more thorough seasonal purge twice a year. Consistent habits prevent major clutter build-up.
Summary
Transforming a small kitchen involves using every bit of space wisely. By organizing room-by-room, you create systems for cabinets, drawers, and countertops. For further tips, the Wikipedia page on small kitchen organization offers detailed design principles.
Utilizing vertical storage, clear containers, and smart dividers makes a big difference. Maintaining these habits keeps your kitchen functional and enjoyable. You can achieve an organized and efficient cooking space with these simple, practical steps. Maintaining a regular decluttering schedule is a key recommendation from the Wikipedia article on decluttering.

![Renting And Can’T Renovate Small Kitchen Design Ideas For Renters[1]](https://kitchentoolslab.com/wp-content/uploads/2026/05/Renting_And_CanT_Renovate__Small_Kitchen_Design_Ideas_For_Renters1-768x403.jpg)
![Vertical Storage Solutions For Small Kitchens Maximizing Every Inch[1]](https://kitchentoolslab.com/wp-content/uploads/2026/05/Vertical_Storage_Solutions_For_Small_Kitchens__Maximizing_Every_Inch1-768x403.jpg)
![Small Kitchen Mistakes That Make The Space Feel Even Smaller (And How To Fix Them)[1]](https://kitchentoolslab.com/wp-content/uploads/2026/05/Small_Kitchen_Mistakes_That_Make_The_Space_Feel_Even_Smaller_And_How_To_Fix_Them1-768x403.jpg)
![Mirror And Glass In Small Kitchens Do Reflective Surfaces Actually Expand Space[1]](https://kitchentoolslab.com/wp-content/uploads/2026/05/Mirror_And_Glass_In_Small_Kitchens__Do_Reflective_Surfaces_Actually_Expand_Space1-768x403.jpg)
![Small Kitchen Layout Ideas Which Layout Works Best For Under 100 Sq Ft[1]](https://kitchentoolslab.com/wp-content/uploads/2026/05/Small_Kitchen_Layout_Ideas__Which_Layout_Works_Best_For_Under_100_Sq_Ft1-768x403.jpg)
![Small Kitchen Island Ideas When Does An Island Actually Work In A Tiny Kitchen[1]](https://kitchentoolslab.com/wp-content/uploads/2026/05/Small_Kitchen_Island_Ideas__When_Does_An_Island_Actually_Work_In_A_Tiny_Kitchen1-768x403.jpg)