Adapting a Sourdough Starter for Bread Machine Baking Success
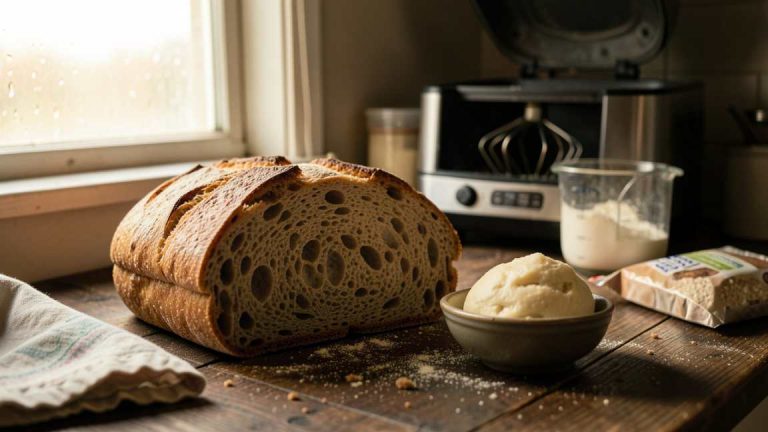
Adapting a sourdough starter for bread machine baking success requires lowering dough hydration to 62–68 percent, scheduling a cold bulk fermentation for 12 to 18 hours, and using a mature starter fed at a 1:2:2 ratio eight to twelve hours before mixing. Lowering the hydration is the single most important adjustment because it prevents the dough from becoming too slack for the machine’s kneading mechanism. A cold bulk fermentation works with the machine’s delayed timer and allows wild yeast to develop flavor and rise without added commercial yeast.
The Core Challenge of Adapting Sourdough to a Bread Machine
Bread machines run on rigid, automated cycles. A sourdough starter follows a flexible, biological timeline. This guide shows you exactly how to bridge that gap for consistent, bakery-quality loaves.
Quick Verdict: Simply put, adapting a sourdough starter for bread machine baking success requires three specific changes. You must lower the dough hydration to 62-68% to match the machine’s kneading mechanism. You need to schedule a cold bulk fermentation in the fridge for 12-18 hours. And you must use a mature, predictable starter fed 8-12 hours before mixing.
Key Takeaways
- Lowering the hydration of your sourdough to 65% is the single most important adjustment for machine compatibility.
- Cold bulk fermentation in the refrigerator for 12 to 18 hours allows the machine’s delayed timer to work effectively with wild yeast.
- A mature sourdough starter fed at a 1:2:2 ratio (starter:flour:water) reaches its peak predictably within 8 to 12 hours.
- Bread machines typically under-bake sourdough due to the lower hydration and lack of steam – you must check the internal temperature, which should reach 205°F.
- You can achieve a good oven spring in a bread machine without any commercial yeast by using a strong starter and a short, warm final proof.
What Is a Sourdough Starter?
A sourdough starter is a living culture of wild yeast and lactic acid bacteria. It is the oldest form of leavening for bread. According to a study published in the Journal of Food Science, a mature starter can contain over 50 different species of lactic acid bacteria, each contributing unique acids and flavors to the dough.
These days, most home bakers maintain their starters with a simple 1:1:1 feeding ratio. For example, 50 grams of water, 50 grams of flour, and 50 grams of starter. The strength and fermentation speed of your starter directly determine your bread machine baking success.
The Science of Wild Yeast and Lactobacillus
The wild yeast in your starter, primarily Saccharomyces cerevisiae, produces carbon dioxide gas that makes the dough rise. The lactobacillus bacteria produce lactic and acetic acids. These acids give sourdough its tangy flavor and help preserve the bread naturally.
King Arthur Baking Company reports that a healthy starter doubles in volume within 4 to 8 hours after feeding. If your starter takes longer than 12 hours to double at room temperature, it lacks the strength needed for reliable machine baking.
Tip: Feed your starter with a 1:2:2 ratio (one part starter, two parts water, two parts flour) instead of the standard 1:1:1. This larger feed gives the yeast more food, leading to a longer, more predictable peak window that aligns better with the bread machine’s schedule.
Why Bread Machines and Sourdough Don’t Naturally Align
Bread machines were designed for commercial yeast. Commercial yeast works fast and predictably within a 2 to 4 hour cycle. Sourdough starter works slowly and flexibly. Three main factors cause this conflict.
- Timing: Machines automatically progress from kneading to rising to baking. Sourdough often needs a 4 to 12 hour bulk fermentation that doesn’t fit into a single machine program.
- Temperature: The internal temperature of a running bread machine can reach 85-90°F during the rise cycle. This can cause the sourdough to over-proof before it bakes, leading to a flat or collapsed loaf.
- Hydration: Sourdough recipes for hand baking typically use 70-85% hydration. Bread machine doughs work best between 60-68% hydration. High hydration dough is too sticky for the machine’s paddle and fails to develop proper structure.
Quick Comparison: Hand-Kneaded vs. Bread Machine Sourdough
| Feature | Hand-Kneaded Sourdough | Bread Machine Sourdough |
|---|---|---|
| Dough Hydration | 70% to 85% | 62% to 68% |
| Hands-On Time | 30 to 45 minutes (stretch and folds) | 10 to 15 minutes (mix and shape) |
| Total Time (Active + Passive) | 4 to 8 hours | 30 min active + 12-24 hours passive |
| Crumb Structure | Open, irregular holes | Tighter, more uniform crumb |
| Crust Thickness | Thick, dark, blistered | Thinner, softer, more uniform |
| Learning Curve | Steep (requires practice and intuition) | Moderate (requires precise ratios) |
How to Convert a Sourdough Recipe for a Bread Machine
Converting a standard sourdough recipe for a bread machine requires four specific adjustments. Follow these steps in order for the most consistent results.
Step 1: Assess Your Starter’s Strength
Before adapting any recipe, verify that your starter is strong enough. Feed your starter at a 1:2:2 ratio. It should double in volume within 6 to 8 hours at room temperature. If it takes longer than 10 hours, your bread will likely come out dense.
Step 2: Lower the Hydration
Bread machine doughs need to be firm enough for the paddle to knead effectively. Reduce the water in the recipe by 10 to 20 grams for every 100 grams of flour. This moves the dough from a high-hydration (70-80%) range down to a machine-friendly range (62-68%).
Warning: Never reduce the hydration below 60%. Dough below this level becomes too stiff for the wild yeast to expand, resulting in a dense, brick-like loaf. The sweet spot is 65% – it is dry enough for the machine but wet enough for good fermentation.
Step 3: Use a Cold Bulk Fermentation
The standard machine cycle of 2 to 4 hours is too short for proper sourdough fermentation. Instead, mix the dough with cold water, place it in an oiled bowl, and move it to the refrigerator. This cold bulk fermentation should last 12 to 18 hours.
During this time, the starter slowly consumes the flour, producing gas and developing flavor. The cold temperature prevents over-proofing while giving the yeast enough time to build structure.
Step 4: Adjust the Machine Program
Use the “dough only” cycle on your machine, which kneads and rises but does not bake. After the dough cycle finishes, let the dough rest in the machine for 30 minutes. Then select the “bake only” cycle for 50 to 60 minutes.
This two-stage approach gives you control over the final proofing time, which is critical for sourdough. If your machine has a “sourdough” setting, use it, but still check the internal temperature at the end.
What Is the Best Hydration for Sourdough in a Bread Machine?
The best hydration for a bread machine sourdough is 65%. This hydration level balances kneading efficiency, fermentation speed, and final crumb structure. Here is a breakdown of how different hydration levels perform in a machine.
| Hydration Level | Dough Behavior in Machine | Final Crumb | Success Rate |
|---|---|---|---|
| 60% to 62% | Very stiff, forms a tight ball easily | Dense, small, tight crumb | High (very consistent) |
| 63% to 67% | Moderately soft, kneads cleanly | Open, even, soft crumb | Very High (optimal range) |
| 68% to 72% | Sticky, may pool around the paddle | Slightly open crumb, thicker crust | Moderate (slightly inconsistent) |
| 73% to 80% | Very sticky, fails to form a ball | Flat, gummy, or collapsed | Low (not recommended) |
Common Myths vs. Facts About Sourdough Bread Machines
Myth 1: You Cannot Make Real Sourdough in a Bread Machine
Fact: You can absolutely make real, 100% naturally leavened sourdough in a bread machine. As long as you use a live starter and no commercial yeast, the bread qualifies as real sourdough. The machine simply replaces the manual kneading and baking stages. The fermentation still relies entirely on your wild yeast culture.
Myth 2: Sourdough Requires Too Much Hands-On Time
Fact: Using a bread machine significantly reduces hands-on time. Hand-baking sourdough requires 4 to 6 stretch-and-fold sessions over 2 to 3 hours. Machine baking requires only 10 to 15 minutes of mixing and shaping at the start. According to a survey by King Arthur Baking, home bakers spend an average of only 12 minutes actively working on a bread machine loaf.
Myth 3: You Must Add Commercial Yeast for a Good Rise
Fact: A properly maintained starter provides more than enough leavening power for a bread machine. The key is using a mature starter at its peak activity. Feed your starter 8 to 12 hours before mixing the dough. If you see a domed top on your baked loaf, your starter was active enough. Adding commercial yeast is a crutch, not a requirement.
Step-by-Step Process for a Perfect Loaf
Follow this specific schedule to consistently produce a well-risen, flavorful sourdough loaf using your bread machine.
- Feed your starter (8:00 AM). Mix 20 grams of starter with 40 grams of water and 40 grams of bread flour. Cover loosely and leave at room temperature.
- Check for peak (4:00 PM to 6:00 PM). The starter should have doubled in volume and be domed on top. It should smell tangy and fruity.
- Mix the final dough (6:00 PM). Combine 400 grams of bread flour, 260 grams of water (65% hydration), 100 grams of active starter, and 8 grams of salt. Use a spatula to form a shaggy dough.
- Cold bulk fermentation (6:15 PM to 8:00 AM next day). Place the dough in an oiled bowl, cover tightly, and transfer to the refrigerator. Let it ferment for 12 to 14 hours.
- Shape and load the machine (8:00 AM). Remove the cold dough. Shape it into a tight ball by pulling the edges toward the center. Place it seam-side down in the bread machine pan.
- Final proof in the machine (8:15 AM to 10:15 AM). Close the lid. Use the “dough only” cycle or simply keep the machine off in a warm spot. Let it rise until the dough reaches the top of the pan. This usually takes 1.5 to 2.5 hours.
- Bake (10:15 AM to 11:15 AM). Select the “bake only” cycle for 55 minutes. Check the internal temperature – it must reach 205°F for a fully baked loaf.
- Cool completely (11:15 AM to 1:15 PM). Remove the bread from the pan. Let it cool on a wire rack for at least 2 hours before slicing. Cutting too early destroys the crumb structure.
Tip: If your machine’s “bake only” cycle is fixed at 50 minutes, manually turn it off and restart it for an extra 10 minutes. Sourdough bakes best with a longer, slightly lower temperature bake compared to commercial yeast breads.
Troubleshooting Common Problems
Even with precise adjustments, you may encounter issues. Here are the most common problems and their specific solutions.
| Problem | Likely Cause | Solution |
|---|---|---|
| Dense, heavy loaf with no rise | Under-proofing or weak starter | Extend the final proofing time by 30 minutes. Ensure your starter doubles within 6 hours of feeding. |
| Gummy, wet crumb near the bottom | Over-hydration or under-baking | Reduce hydration by 10 grams. Increase bake time by 10 minutes. |
| Mushroom-shaped dome on top | Over-proofed before baking | Shorten the final proof by 30 minutes. The dough should only rise 75% of the way up the pan. |
| Flour pockets or unmixed streaks | Insufficient mixing or dry starter | Scrape the paddle and pan corners 5 minutes into the machine’s knead cycle. |
| Sourdough flavor is too mild | Short fermentation time | Extend the cold bulk fermentation to 24 hours. Use a 1:1:1 feeding ratio to promote acidity. |
Pro Tips for Sourdough Bread Machine Success
These advanced tips come from experienced sourdough bakers who regularly use machines for convenience without sacrificing quality.
- Use bread flour instead of all-purpose flour. Bread flour has a higher protein content (12-14%) which builds stronger gluten networks. This is critical for machine baking because the machine’s kneading is less gentle than hand kneading.
- Add diastatic malt powder. Add 2 grams of diastatic malt powder per 400 grams of flour. This enzyme supplement gives the wild yeast an extra food source, producing a better rise and a deeper golden crust.
- Spritz the dough with water before baking. Open the lid 5 minutes before the bake cycle starts and spray the surface of the dough with water. This creates steam inside the machine, which helps form a thinner, crispier crust.
- Use a digital scale for all ingredients. Volume measurements (cups) are too imprecise for sourdough. A difference of 10 grams of water can mean the difference between a perfect loaf and a dense brick.
- Keep a baking journal. Record the exact hydration, fermentation time, room temperature, and results for each loaf. Small variables like humidity and flour brand significantly affect the outcome.
Important: Do not trust the bread machine’s pre-programmed bake time for sourdough. The USDA recommends an internal temperature of 205°F for fully baked bread. Insert an instant-read thermometer into the center of the loaf from the top. If it reads below 200°F, run the bake cycle for an additional 10 minutes.
Resources and Tools
King Arthur Baking Sourdough Guide – Comprehensive resource for starter maintenance, feeding schedules, and troubleshooting.
The Perfect Loaf – Detailed guides on hydration adjustments and cold bulk fermentation techniques.
Breadtopia – Reliable source for specialty bread machine flours, whole grains, and sourdow equipment.
Fresh Loaf Community – Active forum where home bakers share their sourdough bread machine experiences and solutions.
Frequently Asked Questions
Can I use my sourdough starter directly from the fridge?
Yes, but it will take significantly longer to leaven the dough. For reliable results in a bread machine, feed the starter at room temperature for 8 to 12 hours until it doubles. According to King Arthur Baking, a hungry starter is the most common cause of dense bread in machines.
Do I need to change my bread machine’s paddle for sourdough?
No, but you should scrape the paddle and pan corners during the first 5 minutes of kneading. This ensures all the flour integrates into the dough. Some machines have a collapsible paddle that works well for sourdough’s firm consistency.
Can I add seeds, nuts, or cheese to a sourdough machine loaf?
Yes, but add them 10 minutes into the kneading cycle, not at the start. Adding inclusions too early breaks them down into small pieces. Sourdough dough at 65% hydration is sticky enough to hold heavy inclusions like walnuts or cheddar cubes.
Why is my sourdough bread machine loaf flat on top?
A flat top usually means the dough over-proofed before baking. The wild yeast exhausted its food supply and the dough collapsed. Shorten your final proof by 30 minutes. The dough should look slightly under-risen, not fully domed, when it goes into the bake cycle.
How do I convert a no-knead sourdough recipe for my bread machine?
Lower the hydration by 10 to 15 percent. No-knead recipes use 75-85% hydration because they rely on a very long fermentation. For a machine, reduce the water so the final hydration sits between 63% and 67%. The machine’s kneading compensates for the lower water content.
Final Thoughts
Adapting a sourdough starter for bread machine baking success comes down to three specific changes: lower hydration, cold bulk fermentation, and a strong starter. Respect the machine’s limits and your starter’s biological needs. With these adjustments, you can enjoy genuine sourdough with the convenience of a bread machine.